One of the reasons that I love where I live is that I can drive to probably 30 greenhouses within 10 miles of my house. It's awesome. And dangerous for my wallet.

the planting day loot
This year we installed a garden, so I took a few extra days off to get it set up (a post coming soon!). One Friday I spent the morning hauling 1,000 pounds of dirt by wheelbarrow across the yard. It may not sound like fun, but the rest of that week was spent calculating structural properties of different kinds of spent nuclear fuel stored in pools, so let's just say that hauling dirt was a nice change of pace.
Anyway, one of the many things I am filling on planting day are my beloved planters. A few days ago I posted about our planters in the backyard, which are a nice short and wide shape for the deck. For the front of our house, I wanted some planters with a different shape that would fit on either side of our garage.
This is what I came up with:

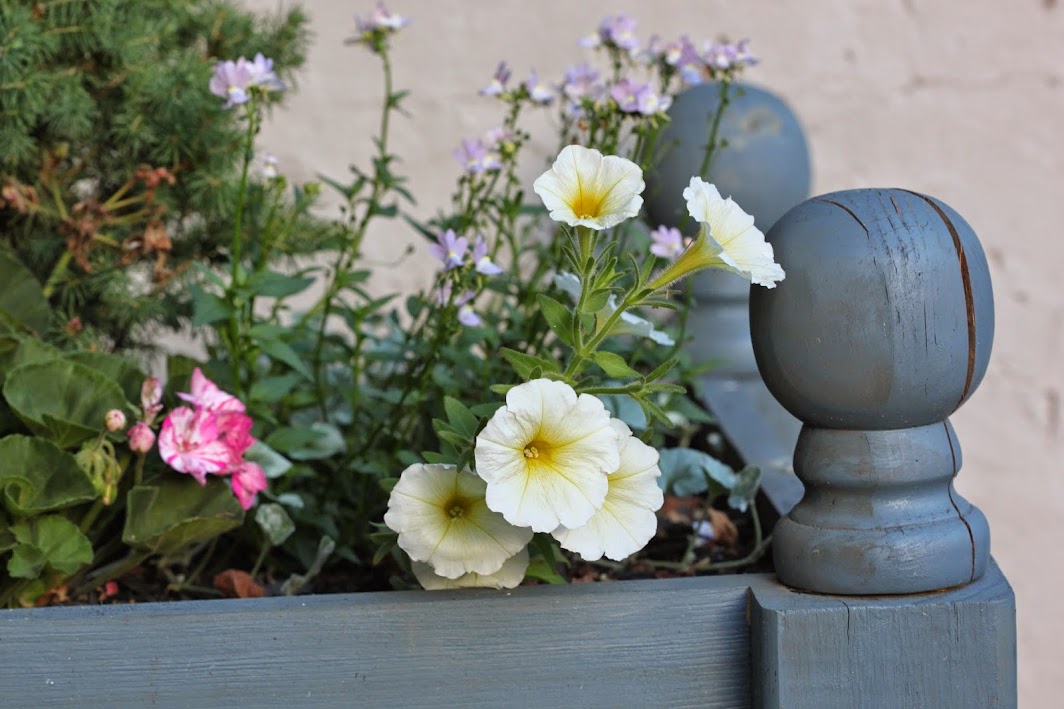
These are actually pretty simple, and I think most of you out there could tackle this one, as long as you can find the right tools. I think I built these without hubby's help, so I promise, it isn't that hard! You need 4x4 posts, and some smaller boards, like 1x3's or furring strips, whatever you can find, as long as they are an inch or less in thickness. Finally, you may want to add decorative fence post finials like you see in the picture.
The first step is to cut a notch out of the length of the 4x4 posts. We cut ours to about 2". The easiest way to do this is with a table saw. This is what they will look like when you are done:

I call this, "rabbit's view" :)
At this point, you may want to consider painting the boards. I didn't, but it was a pain to paint in between the side boards after they were installed. I used outdoor latex paint, actually some that I had left over (so it's free, right?), and only painted one coat because i wanted the wood grain to show through a little bit. I think spray paint would also work if you want a solid coat.
Next, install your sides. I started by lining up the top board with the top of my post, and then spacing out the rest of the first side's pieces evenly using some hardwood floor spacers (you could use just about anything to wedge in between them, or even just eyeball it if you want). Once your first side is installed on the first end, I would move on to the second side, and then work my way around. I made this little diagram to try to show you what i am talking about...

Once you have figured out that puzzle, next is the bottom. You will need to decide where you want the bottom of the planter to be. This might sound funny, but here's the deal. I made these planters to look like they are about 3 feet deep from the outside, but nothing I was going to plant needs that much soil. So, rather than use a ton of potting soil, i put the bottom of the planter about halfway up the side! Sneaky, right? You just need to install a cleat as shown in the picture here (getting a screw into the 4x4 is probably best if you can):

By the way, it just so happens that the scrap piece you cut from the 4x4 makes a perfect cleat for the inside!
Once you have that installed, measure your opening, and cut the bottom boards to length. As you can see in the picture, leave a little bit of space for drainage. You don't have to screw these boards in if you don't want to.
Next, install your decorative fence post finials by drilling a hole and screwing them in. They come with a screw sticking out of them, so it's really easy.
I lined my planters with gardening fabric, just to make sure that the soil didn't run out. Just cut the fabric to length, and staple it on.
Finally, you can fill your planters with your favorite potting soil, and some great flowers!

Easy, isn't it?

~Amy
VERY creative! You are amazing!
ReplyDelete