Today I'll be sharing the beginnings of our basement reno. It's not finished yet, but the end is in sight, so I feel like I can share where I started without having to wait another year to see the final product (at least I hope!). First, let's talk about where we started from, and what we decided to tackle.
When we bought our house, the basement was semi-finished. I say "semi" because it was finished, but not with great quality. Not too long after we moved in, we realized that we had water problems. Every time a big rain came, the water ran straight down our driveway, into our garage, then to the low point on our basement slab, at the opposite corner of the house. Eventually we realized that the basement was semi-finished in an attempt to cover up the fact that water had been in the basement before and would show up again. It's such a bummer to have a space in your home that you counted as usable, but threatens to trash everything you keep there!
I have said before, at least to myself, that I would not use this blog as an outlet to bash the family who lived here before us. I'll tell you all the stories in person, some are hilarious, but not on the internet. That said, in the hopes that someone could learn from our mistakes, let me just say this. If you are looking at a home to buy and come across areas that were recently renovated, look at them carefully. Some owners update their homes before putting them on the market, and make sure that quality work is done. Others will do a sloppy job or worse, try to cover up damage. If you come across a renovated room, just look at it carefully, and ask questions to understand why those changes were made.
So, let's see some before pictures...
This is the laundry room, complete with a dryer that vents to the garage. And damaged ceiling tiles. Also, although the layout was roomy enough, I always had storage issues. Note the folding drying rack that doesn't have a good home.
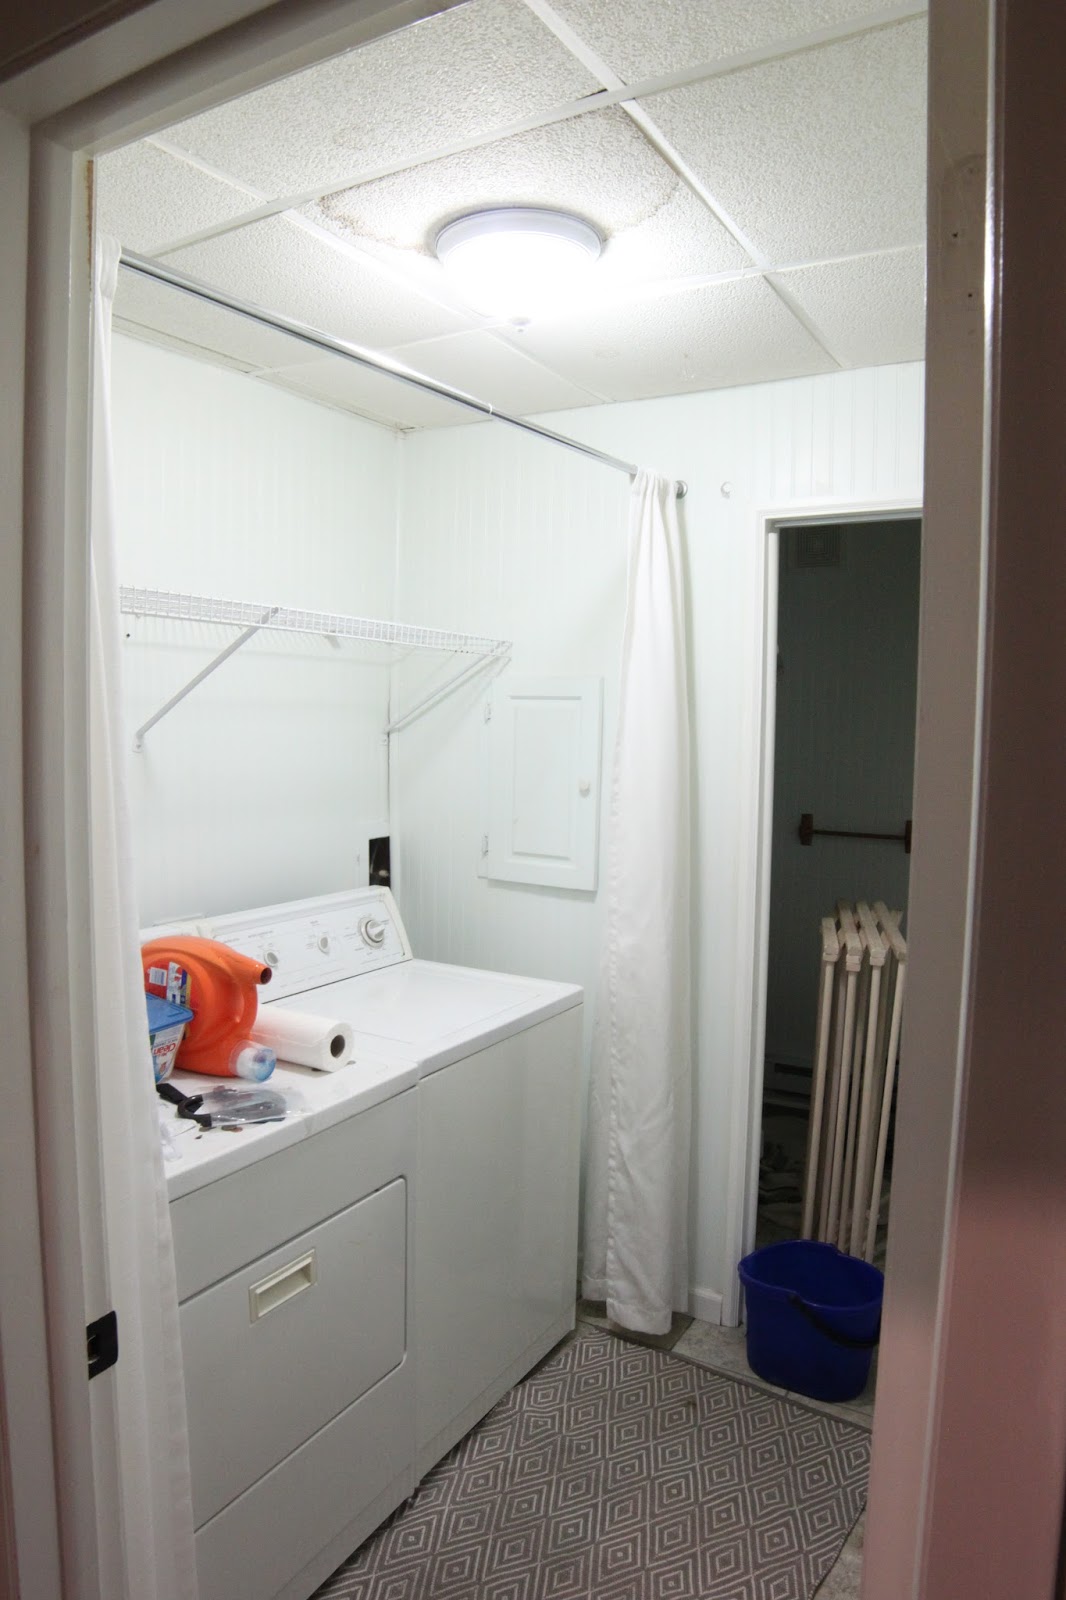
You may be able to see that the laundry room acted as a pass-through to the bathroom. It's shown more in this picture, with a straight view to the toilet! P.S., if the doors were open, this was the view from the front door. Be still, my heart.

And, once you journeyed past the laundry, here's what you'd see for a bathroom:

Ok, to be fair, I could have tried to clean up before I took the pictures. But this is typically how it looked, because we were never really able to use it as a functional bathroom. The shower was broken, and thanks to the water intrusion, it just never felt clean.
Anyway, back to my story. After the rains came down and the floods came up a few times in our basement, we knew we had to do something. Preferably, we would fix the water issue before we did anything about the damage in the house. So, we had our gutters re-routed away from the house last fall (way cheaper than I thought), and had our driveway re-sloped this spring, with a drain in front of the garage door that spits out in the backyard (painfully expensive).
While we were working on all of that, I noticed that we were actually getting a mold problem in the basement. I wanted to do everything in order, but I can't live with mold. So, in fall of last year, I went on a demo mission. I believe this sums up my efforts well:


To help explain my thought process, here's a floor plan:

I mentioned a few of the issues I had with this space above, but to summarize:
- The dryer vented to the garage, which left the garage humid and nasty. Improvement: properly vent dryer
- The laundry room was spacious enough, but didn't have much in the way of storage. Most of the open space was used as a passageway to the bathroom. Improvement: room for laundry and pantry storage.
- The bathroom was very small, and had to be accessed by the laundry room. Even if the shower worked, I doubt we would have used it much just because of its awkward location in the house. Improvement: more functional layout for bathroom
- One important thing to know here is that the room labeled "Guitar Room", which we use as Matt's studio, is a larger room that we actually used as a bedroom when we first moved in. If the bathroom was accessible from that room, we could market it later as an optional master bedroom. Improvement: bathroom access from the guitar room
So, sparing you the details of what we decided not to do, here's the layout that we ended up with:

Here's why this accomplishes those improvements I mentioned:
- Improvement: properly vent dryer. I played around with having the laundry along the exterior wall (where the sink and toilet are in the layout above) to allow the dryer to vent, but this allow for the dryer exhaust to go up to the ceiling and through a bay in between the joists to get outside. It's an extra 5 feet of smooth piping compared to having the dryer right at the wall, and our dryer has been able to vent fine.
- Improvement: room for laundry and pantry storage. Technically I'm still working on this part, but the open space in the room is no longer needed for a pass through, which gives the possibility for more storage.
- Improvement: more functional layout for bathroom and bathroom access from the guitar room. Long story short, we gave up a closet in the guitar room for access to the bathroom. In turn, this gave us a little more room in the bathroom as well. This allowed for a full-sized tub, and a reasonably spacious feel to that room. There are no giant closets in this house anywhere, and this room has plenty of space for furniture storage, so I think the benefit outweighs losing the closet. It's not shown well on the floor plan, but this also makes the bathroom easily accessible from our deck, which will be nice for entertaining out there.
Lastly, to give you an idea of where this is headed, I'll leave you with a "mood board" of my design plan for the bathroom:
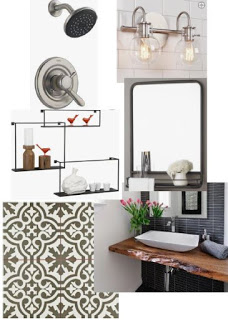
I'll explain the design details in later posts, but I had put something nice looking in here! Stay tuned!
~Amy
No comments:
Post a Comment