First, the before. For the first half of last year, our basement looked basically like this:

This was our laundry room and (second) bathroom, but due to water damage and a layout that was not ideal, we ended up here.
There's no natural light in here; I did my laundry by flashlight for months. And the stuff that was supposed to be in these rooms, aside from the washer and dryer, was scattered around the house. I chose to make it this way temporarily, but it was not a comfortable way to have my house.
So why talk about it? Because, I feel like this is the honest way to go about telling everyone about the project. This is the reality of choosing to handle a renovation yourself, and I don't want to throw a bunch of "After" photos up here and pretend that any homeowner can do that in a few weeks. It took us months. A lot of months. We saved money by not using a general contractor, but the price is that it takes more time and all of the decisions are on you. If you are thinking about remodeling a room to this level in your house, let that weigh in to your decision on how to approach it. There's a saying out there that you can finish a job "good, fast, and cheap" but you only get to pick two. So true. Honest blogging, y'all.
So, then here is the true "before" state of the bathroom:

And, here's how it looks today:
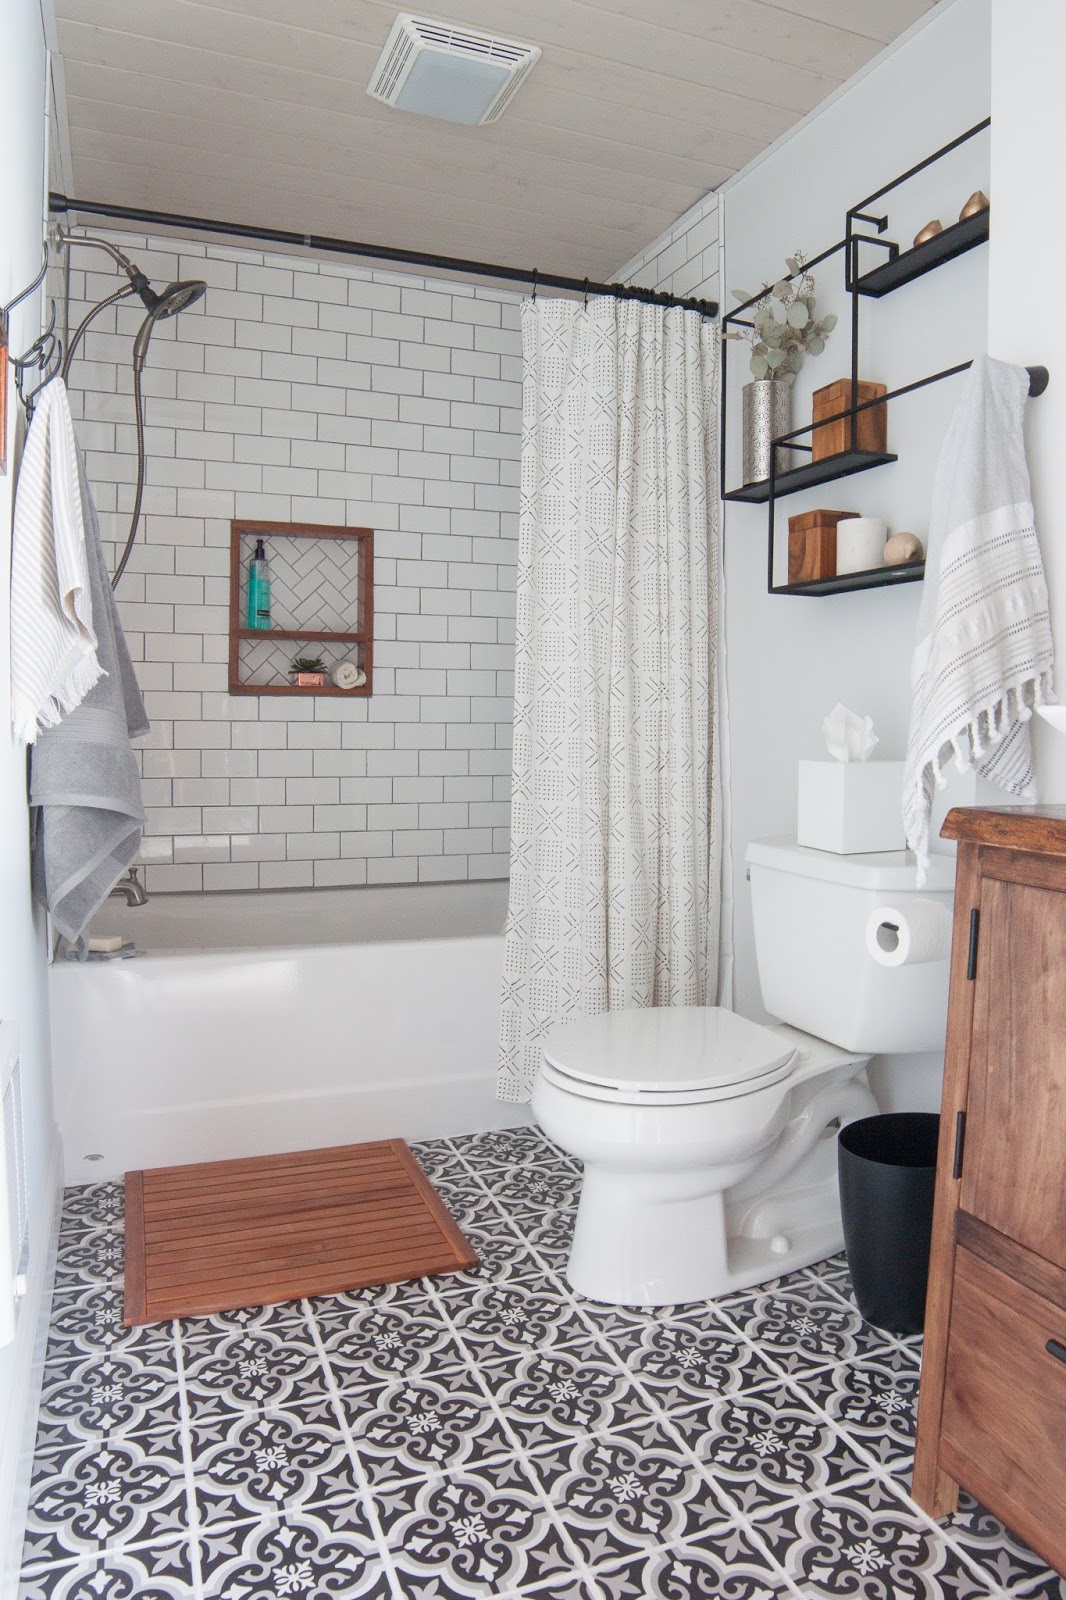
Exactly one million times better! If you are looking at this picture and are totally confused at how they can be the same space, know that major layout changes were made, and this post helps to explain that a little bit.
My theme in here was black, white and wood, with the main inspiration coming from the floor tile and the slab of walnut we used for our counter top. I really like what the tile adds to the space in visual interest, and I like that the wood elements which bring some warmth into the room. This room is 5' wide and just under 9' long, which is not huge, but I don't feel cramped at all in there. The original bathroom was 5' x 6.5', and that extra 2.5' really free up the space.
Looking back from the shower, you can see the little nook that our vanity fits into. We had to create that little bump out that you see to accommodate plumbing from upstairs, which ultimately lead to a custom-built vanity. It's a small space, and particularly short on counter space, but I think we made the most of it.

Here's just the sink area, which it turns out is really hard to photograph! The counter is a piece of live edge walnut from our favorite lumber yard (yes, we have one of those, ha).

I chose the handheld shower head with dog baths in mind, and this set just looks nice too. One of my favorite parts of this bathroom is the teak wood framing out the shower niche. It breaks up all of the white tile, and ties into the rest of the wood elements in the room.

The longer wall has some simple towel hooks and a few small frames to fill the area, without cluttering up the space.

Overall, I'm thrilled with how this turned out. I have never completely gutted a room before, let alone moved walls around, but this one came together (eventually) so well. We have a second, fully functional bathroom in our little house, and it's beautiful and finished.
As I mentioned in the beginning of this post, I'll be writing a few posts to go into the details of the room. If there's anything in particular that you'd like to know about, please leave a comment below and I'll be sure to address it!
I have also published a source list here for all of the readily available items in this room.
Other posts in this series:
The beginning and new floor plans
Source List
Thanks for reading!
~Amy
No comments:
Post a Comment