I wanted to share a project with you that I just finished- a new gallery wall for our entryway.

Since we got home from our vacation to Colorado, I have been feeling the need to hang some more picture frames in the house. So, I have been working on editing my vacation photos and eyeing up blank walls in the house.
I spotted our entryway as one place that looked a little bare:

it's a little hard to photograph, but you get the idea...
So, I started collecting picture frames. I managed to find a bunch around the house, and picked up a few on clearance at the craft sore. The only problem was I wanted all white frames with white mats. Most of the frames that I had laying around, and even some of the ones I bought were not white. So, enter the spray paint. i didn't photograph this step, since it's pretty straightforward... just remove the back of the frame and the glass, and spray.
One trick I learned for hanging frames, especially when it's a bunch of them, is to trace the frame onto paper (newspaper, wrapping paper, whatever large paper you have laying around), and mark where the nails should go. Then, put those pieces of paper up on the wall with painters tape. It will look something like this:

I realized about 4 frames in that the smiley faces I was drawing on (to know which way was up) were totally unnecessary since the nail holes would always be at the top, but by then I was attached to them. So all of my papers got smileys. I know, weirdo.
The first great thing about this method is that if (and when) you don't like the way you placed the frames on the wall, you can move them without ever having to put holes in the wall. So, when I realized that my layout above didn't quite work (and needed a few more frames to fill it out), I could re-arrange:

And end up with something much more balanced. Now, you might be asking why I ignored the right side of the wall. Two reasons: one, I didn't want to hit the frames when the door opens, and two, I am planning on putting a little shelf/hook deal in the corner (which I might get up today!).
So, this is where the wall stayed for a few days... luckily i didn't have anyone over, but if I did my plan was to not say anything, and pretend like it was the finished product. Just to see if anyone would believe me. Haha.
Moving on to great thing number 2 about this method: You know exactly where to put the nails! There is nothing worse than trying to measure the distance from the edge of the frame to the hanger- I get it wrong every time! Just look for your mark on your template, and voila:

Now, just rip the paper down and hang that frame up. A little hint for a gallery wall of mismatched frames- don't tear down all of your papers at once, or you will be left with a wall of scattered nails and never remember which frame went where! Either label your papers, or just hold the frames up and see what fits there before removing them one at a time.
At this point, I decided I was done:
See anything missing?
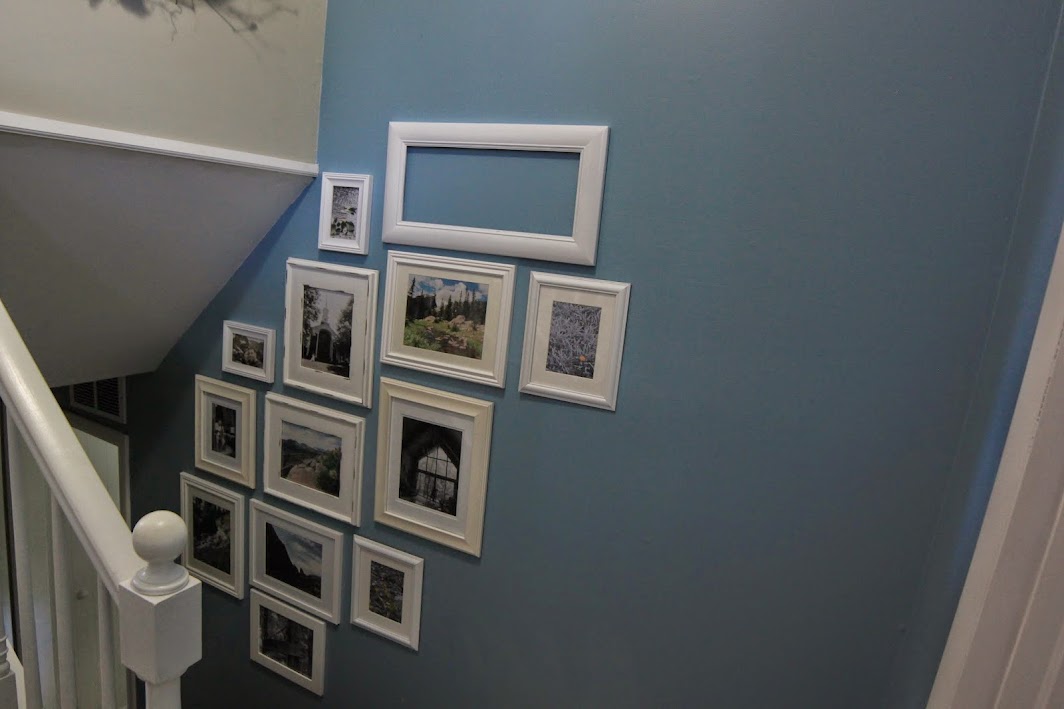
That's right, the late-add frame at the top with nothing in it... I bought that frame, which originally was matted for 4 photos, to hold a panoramic photo. Problem is, I haven't finished one of those yet. When I needed more frames for the gallery wall, this one fit in so well that I decided to hang it anyway.
But I just couldn't leave it alone. I could not bring myself to post a 95% done project. That's half the reason that I made this blog- to actually finish things!
Instead of working on a panoramic photo, I found some scrap mat board and a can of chalkboard paint. I sprayed the mat board with the spray paint, which curled a little more than i expected it to, but I managed to get it mostly flat in the frame, so I think I'm ok! I added a happy Welcome message, and put it back up on the wall. Much better.
Here's the finished product... ok, ok, minus the shelf, but I'm counting that as a separate thing ;)


If you are looking for some help on how to put a gallery wall together, well, I'm not really an interior designer. I'm sure they have some magic formula for how to make things look right, but I just go by trial and error. I did intentionally do a few things that I like in the finished product:
-All white frames/mats: Technically, a few are cream, but I'm ok with that. We have white trim throughout our house, and so I thought using the white frames here would tie in nicely.
-A mixture of frames: I think this works well because they are all white, but I didn't want them to look formal. If you want a more formal look, you can buy templates with various sized frames that all match, I just wasn't looking for that here.
-These are not perfectly spaced or lined up. This just wasn't really possible with using the random frames, and going down the stairs like this. I tried to keep about an inch between the frames, but you can see that it isn't totally uniform. I kept the small spacing because I wanted the eye to see them as one collective piece, and I think that helps.
Total cost for this project: $25 (most of my frames were around the house)
Total time for this project: 4 hours, not including photo printing
I'll be sure to put up a quick post once the totally separate, just coincidentally in the area shelf gets put up (yes, I'm trying to sell myself so I can count this as finished), so hopefully the placement of the frames will make a little more sense.
Hope you have a great weekend!
~Amy
No comments:
Post a Comment