Working on my house is mostly fun for me, but I think the hardest part is knowing what to do when. Like this typical train of thought:
This is probably not our "forever" home.
So why bother doing more than regular maintenance?
But it needs work. I could not pass the problems on to the next family.
Then why not make it better while I'm fixing?
This stuff stresses out my family (dog included).
Is my style what will sell a home in Lancaster County?
Am I going to finish making this house mine, just in time to move?
Does this cost too much?
Does any of this sound familiar to anyone? Well, that's the common theme in my head as I have been thinking about our kitchen. The counter tops are worn out. The cabinets aren't made well. The floor has gaps in between the crappy tiles and they are approximately the color of dirt. But to fix all of that will take tons of effort (and money!) that I can't give right now.
Saturday, December 17, 2016
Monday, November 28, 2016
Christmas 2016, Indoors
Hey Friends!
Hope you had a great, restful Thanksgiving weekend. We were thankful for a little bit of time at home to relax, along with visiting with family. Four day weekends are just awesome.
While I was prepping for Thanksgiving last week, I had one of those 'now or never' realizations with Christmas decorating, when I noticed that my calendar was full and if I didn't get it done now, it just wasn't going to be worth the hassle. So, for once, I am going to have something up on the blog in a timely manner!
My theme lately has been trying to keep things simple, and to not overdo things where honestly, it just doesn't matter. It's just too much stress to try to come up with something complicated and new, when simple and classic is just as good. There was about a day or two in there where I was going to re-create this tree... didn't exactly fit the simple mold. Besides, I'm just not much of a seasonal or holiday decorator to begin with. Serial re-decorator, yes. Valentine's Day? Not so much.
So, I decided that I would decorate with a simple color palate, and just use mostly what I already had around the house whether it was a "Christmas Decoration" or not. For me, silver/mercury glass, gold and white were feeling pretty good. I know there's a lot of blush/rose gold floating around this year, but that was a little too trendy for me. I put this color scheme on my living room shelves and on the tree.
Well, let's just get to some pictures, shall we?
Sunday, November 20, 2016
Keeping Herbs Year Round
Hey Everyone!
My full time job has kept me from finishing anything really significant around the house, but I did get a small project done:
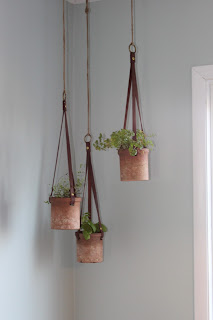
Bringing some herbs inside to (hopefully) keep going over the winter. Back in September, I saw this idea on Chris Loves Julia (a great blog), and straight copied from her. It took me a little while to get everything hung up, which is why this isn't particularly timely, but the herbs seem to be doing ok so far!
Tuesday, October 18, 2016
Front Door Refresh
It's probably rude or something to drop off the blog world for a couple months, and then show up with a tiny post, buuuut here I am.
Our front door gets intense afternoon sun, and so it needs to be repainted every few years. I had repainted it a slightly darker version of the original color when we first moved in, probably 4 years ago, but it was looking a little rough:


Our front door gets intense afternoon sun, and so it needs to be repainted every few years. I had repainted it a slightly darker version of the original color when we first moved in, probably 4 years ago, but it was looking a little rough:


And the storm door was even worse. The paint was faded, and the brass was looking dull and worn:

I plan to replace the front door in the future, but to perk it up a little bit in the meantime, I figured some paint and polish could do the trick. Once I painted the front door, I kept going on the storm door, and once that was finished, I painted the back of the door too (paint addict)! Some brass polish really helped the door hardware, but it took some major elbow grease to get it back to a nice shine!
I went a little darker in color, but still wanted a green undertone so that I didn't need to repaint the shutters and garage door which previously matched the front door.
So here we are! Sorry for the crappy door censoring... I have my house number on the door, and just wasn't sure that i wanted to share it with the world, haha.


I really like the richness of this color (BM twilight, outdoor semigloss), and fact that it was in the same family as the previous color means that it breaks up the color on the rest of the house without looking out of place. I also LOVE how the storm door looks. I'm not sure that standard door paint is ideal for the door, but it was looking terrible, and this just helps it blend in nicely. And the brass! It looks brand new, guys.
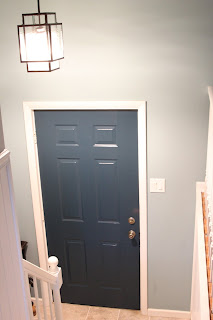
Inside, this door was white, and showed every ding and smudge, and I was constantly trying to make it look clean. Of course, I didn't take a before, but here's the after:
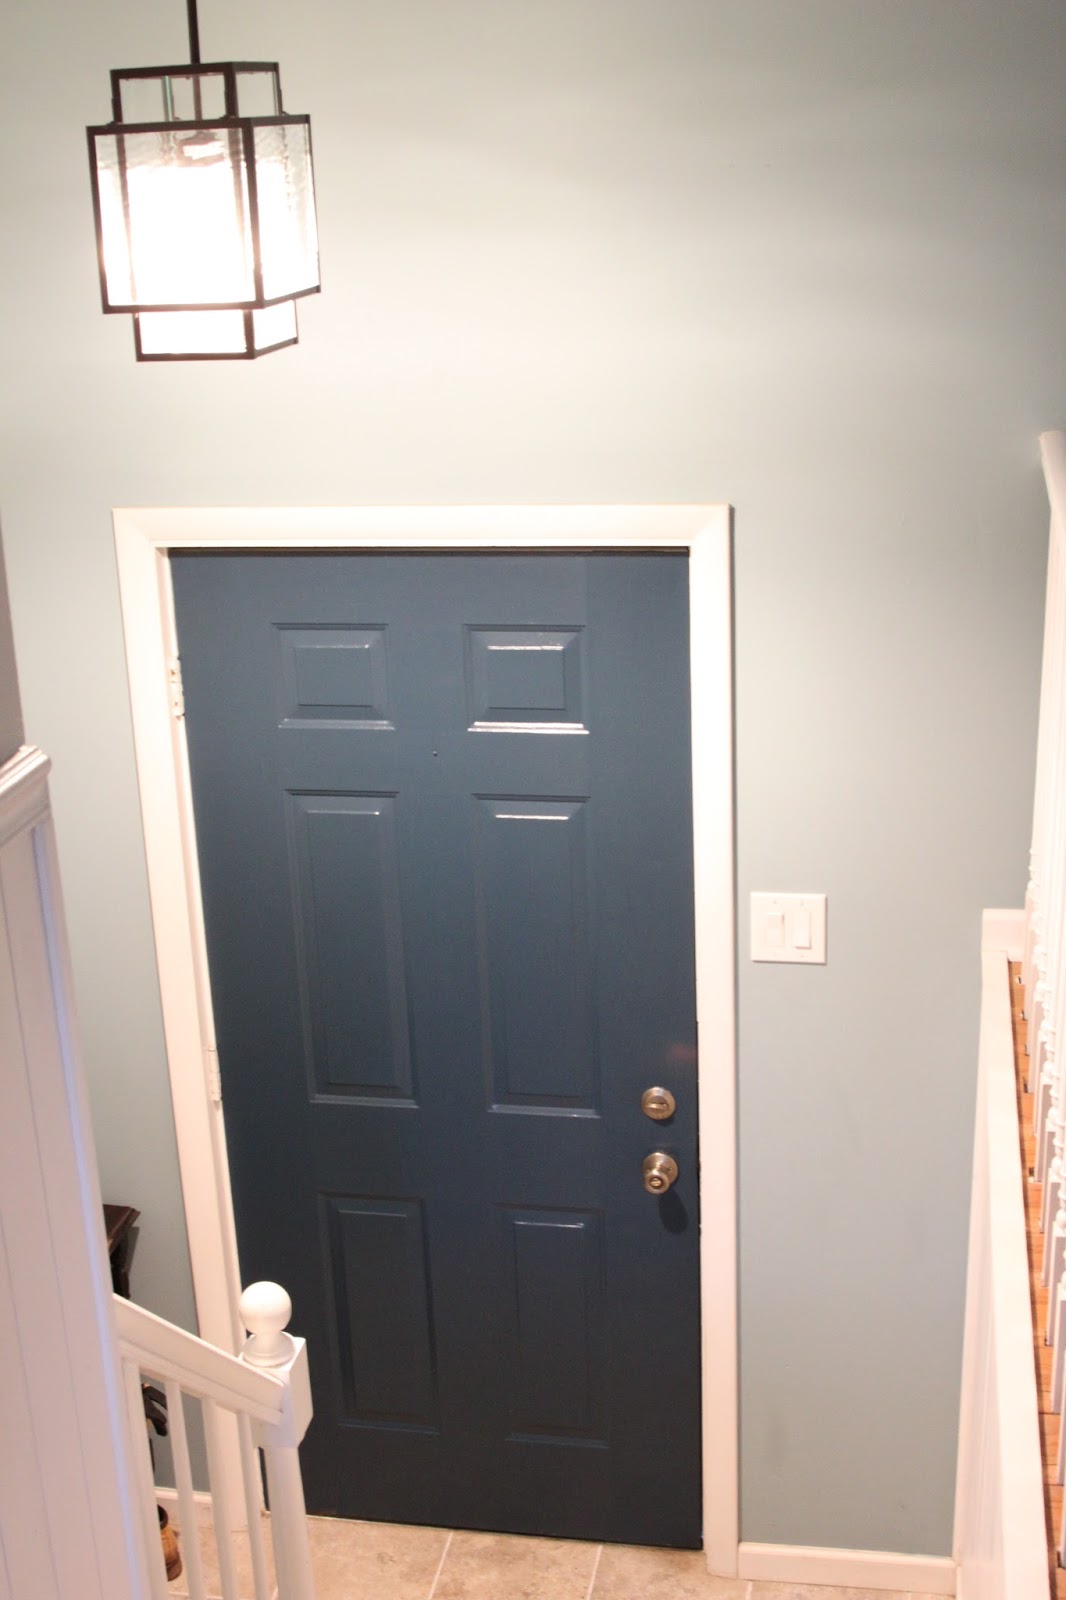
It does make the entry a little dark, but I have not noticed the dents since I painted it, so I'm calling it a win!
It is funny how differently this color reads in the bright sun versus the inside, where it almost looks navy.
Anyway, it was a quick update, but it's a much nicer welcome home than before.
Any quick changes that you are looking to knock out before winter arrives? The days feel so short already!
Have a great week!
~Amy
Sunday, July 31, 2016
On the Deck: Shade Cloth to Keep it Cool
I know people say that life slows down in Summer, but I think it's the opposite for us. The last couple months have been a total blur. Maybe it only slows down for people with school-age kids and teachers? I hope some of you out there are enjoying some peace and rest! Anyway, I intended to have this up on the blog much sooner, but better late than never, right?
Continuing on in the deck series...
One of the things that I debated when we designed our deck was whether or not to put a roof on the lower half. I liked the idea of being able to use it in all types of weather, and not having to worry as much about what I put out there. If we move, I think have a front porch will be high on my list! A full roof was going to add a lot of complications and cost, so we decided on a pergola. I researched some options for putting a "roof" on a pergola, like corrugated metal or plastic (which would look ugly from the upper deck), or metal/vinyl shades like this one (which would cost about $1000 for a deck our size), or shade cloth. You may have noticed my choice in other pictures, but here's what i went with:

The good part about me putting this post off for so long is that i can give a better answer regarding how the shade cloth has worked out so far. We've had a hot few weeks, and while our deck does not get the blazing afternoon sun anyway, this deck does stay about 10 degrees cooler than the upper deck and surrounding area. Also, it's hard to photograph the full effect, but it does feel like another room in our house and has enabled us to comfortably host more than 3 people at a time (I'm looking at you, tiny living room). We have loved it.
Exhibit A: Band practice on the deck, aka that time Amy did her outdoor chores while being entertained by a live band. No big deal. ;)

Now for the details on how this came together. The best material I could find for shade cloth was sail cloth (like, boat sail), but I have this slight tendency to change my mind, and was really nervous about buying enough sail cloth to cover my deck, only to find that i didn't like how it looked. I love that my deck is approx 25'x12', but all that square footage adds up when you try to cover it! So, to enable me to try this idea out before investing in the pricey, long term version, I went cheap (for now) and made these out of canvas drop cloth.
I found drop cloths at my local hardware store (these, I think) that were 4' x 15'. I bought 5, which allowed me to piece together three strips long enough to run the length of the deck. Where I needed to add length, I used my sewing machine on a heavy stitch with heavy duty thread to attach two pieces of drop cloth together.
I'll get to how I hung them, but I did make one change that I'd like to tell you about. At first I kept the cloths the full 4' wide, thinking that it would give me the space I wanted between the cloths. I hung the first two and this is what it looked like:

You can see in the top picture that I didn't cut them to length right away because I wasn't sure how droopy I would want them to be, and so I didn't know what length would be just right. Anyway, the point of showing you this was that 4' only gave me enough space to hang two cloths (or add a weird skinny one at the end), and it didn't quite look right to me. So, I decided to cut each one down into 3' wide strips and add a third one. Back to the sewing machine!
Anyway, after getting the drop cloths sewed to the right size, I installed three grommet holes in each end of each cloth with this grommet kit (you can see one installed on the cloth in the picture):


From there, I wove each cloth in between the pergola rafters, going over every third rafter, and picking a different one for each cloth. Take a look at the pictures if you are having trouble following that.
Now, for some reason, I thought that I could just tack these cloths down at each end and not have to do anything in the middle. After about two minutes of them being up there, I realized that this wasn't the case. They flapped around and would not keep an even spacing between each rafter. So, while this ruined my hopes of these being easy to take off in the winter (to avoid snow laying on them), my solution seems to have worked well:

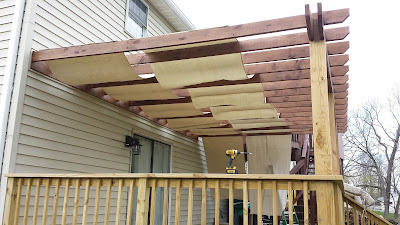
I installed my cloths the first weekend in April (with only the pergola stained...). As I mentioned, I am hoping to take these down for the winter months to help keep the cloth a little nicer. Well, go figure, the very next week we had hurricane-force winds and a snow storm. My poor shade cloths!! Here they are, broken in after only a week (from above).

My seams have not been as durable as i would have liked. I only folded the cloth over once because I was worried that my machine couldn't make it through 3 layers of canvas, but because the seam wasn't rolled under, they have frayed a little bit. I was worried at first that the weather would quickly beat the life out of them, but the fraying seems to have stopped.
Here's a picture of them today, about 4 months later:

They are still looking pretty good! You may be able to tell that when it rains, pollen/dirt have kind of collected in the low spots, like here:


Hope you like it!
~Amy
Continuing on in the deck series...
One of the things that I debated when we designed our deck was whether or not to put a roof on the lower half. I liked the idea of being able to use it in all types of weather, and not having to worry as much about what I put out there. If we move, I think have a front porch will be high on my list! A full roof was going to add a lot of complications and cost, so we decided on a pergola. I researched some options for putting a "roof" on a pergola, like corrugated metal or plastic (which would look ugly from the upper deck), or metal/vinyl shades like this one (which would cost about $1000 for a deck our size), or shade cloth. You may have noticed my choice in other pictures, but here's what i went with:

Exhibit A: Band practice on the deck, aka that time Amy did her outdoor chores while being entertained by a live band. No big deal. ;)

Now for the details on how this came together. The best material I could find for shade cloth was sail cloth (like, boat sail), but I have this slight tendency to change my mind, and was really nervous about buying enough sail cloth to cover my deck, only to find that i didn't like how it looked. I love that my deck is approx 25'x12', but all that square footage adds up when you try to cover it! So, to enable me to try this idea out before investing in the pricey, long term version, I went cheap (for now) and made these out of canvas drop cloth.
I found drop cloths at my local hardware store (these, I think) that were 4' x 15'. I bought 5, which allowed me to piece together three strips long enough to run the length of the deck. Where I needed to add length, I used my sewing machine on a heavy stitch with heavy duty thread to attach two pieces of drop cloth together.
I'll get to how I hung them, but I did make one change that I'd like to tell you about. At first I kept the cloths the full 4' wide, thinking that it would give me the space I wanted between the cloths. I hung the first two and this is what it looked like:


You can see in the top picture that I didn't cut them to length right away because I wasn't sure how droopy I would want them to be, and so I didn't know what length would be just right. Anyway, the point of showing you this was that 4' only gave me enough space to hang two cloths (or add a weird skinny one at the end), and it didn't quite look right to me. So, I decided to cut each one down into 3' wide strips and add a third one. Back to the sewing machine!
Anyway, after getting the drop cloths sewed to the right size, I installed three grommet holes in each end of each cloth with this grommet kit (you can see one installed on the cloth in the picture):

I then put hooks on the top of the pergola to hold each end of the cloth, like this:

From there, I wove each cloth in between the pergola rafters, going over every third rafter, and picking a different one for each cloth. Take a look at the pictures if you are having trouble following that.
Now, for some reason, I thought that I could just tack these cloths down at each end and not have to do anything in the middle. After about two minutes of them being up there, I realized that this wasn't the case. They flapped around and would not keep an even spacing between each rafter. So, while this ruined my hopes of these being easy to take off in the winter (to avoid snow laying on them), my solution seems to have worked well:

I simply bought some upholstery tacks and hammered two in each end on the top of the pergola rafter. One tack would probably work, but I like the look of two. That being said, if I make my "permanent" sail cloth ones down the road, I may use the upholstery tacks on the ends rather than grommets, since it won't really be the time saver I hoped for. Or, I could install grommets and hooks in the middle, but I didn't think it would look as nice.
I installed my cloths the first weekend in April (with only the pergola stained...). As I mentioned, I am hoping to take these down for the winter months to help keep the cloth a little nicer. Well, go figure, the very next week we had hurricane-force winds and a snow storm. My poor shade cloths!! Here they are, broken in after only a week (from above).

That said, you might be asking yourself, so how did they hold up? Was canvas a waste of time? Here's what I've found so far:
My seams have not been as durable as i would have liked. I only folded the cloth over once because I was worried that my machine couldn't make it through 3 layers of canvas, but because the seam wasn't rolled under, they have frayed a little bit. I was worried at first that the weather would quickly beat the life out of them, but the fraying seems to have stopped.
Here's a picture of them today, about 4 months later:

They are still looking pretty good! You may be able to tell that when it rains, pollen/dirt have kind of collected in the low spots, like here:

But it's not super noticeable, and I think i could get up on a ladder and clean them if i had the time. Oh, and since I mentioned it, here's what they look like from the top deck today:

Overall, I have loved my shade cloths. They add a visual softness to the deck which is really nice where everything else is the same shade of wood. They give nice shade and make our deck usable on the hot days. They move around just a little bit in the breeze and it just looks cool!
I had set up our deck at one point before the shade cloth was installed, so for fun, here's a (kind of) before and after pic:


It's been a great addition to our deck, and I'll keep you posted if/when I make a switch to the "permanent" version!
~Amy
Tuesday, June 14, 2016
On the Deck: Plants Are a Must
As I introduced last week, after years of planning and construction (in 2 phases!), we are really excited to have a fully functional deck. I don't have all of my "deck projects" finished, but it is at least at the point where I can sit out there and finally relax. I thought I would spent a few blog posts going through the projects I have finished, so this is the first installment of my mini-series: "on the deck". I know, engineers really are the most creative people out there. If you need someone to concisely state the obvious, I'm totally your girl.
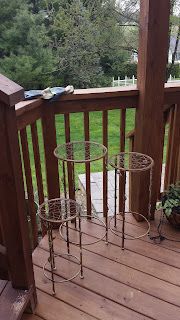
This post is dedicated to the plant life that calls my new deck home, starting with this cute little corner:

To help you get your bearings, the corner is located here, by the orange arrow:

This spot is too small to hold much furniture (picture the traffic flow from the top deck to the backyard), so I decided on a grouping of potted plants instead. To raise the pots off the deck floor, I went on the hunt for plant stands. After some searching at Home Depot without much luck, I found three matching plant stands at Home Goods in 3 different sizes (I think they were something like $10, $15, and $20). The only problem was, they were in a oil-rubbed white color, which looked like this on my deck:

 I think this looks much better! Getting three stands in varying heights adds some visual interest, but making them all the same, solid color makes them unified and not too distracting from the main feature: the plants themselves. You could use the same idea with stands that didn't match - a can of spray paint can work wonders!

If you look the other direction on the deck, you'll see that the plant collection doesn't stop in this corner...

On the left, I have a large pot welcoming you as you make your way up the stairs from the yard. The plant choices turned out to be a little wacky in this pot, but oh well:

Next are two hanging baskets that were a birthday gift from my parents, one of which became a home to a mama mourning dove. She just showed up one day with her eggs, and squawked at me until the babies flew the next.

Next is a pot of yummy herbs:


There are a couple scattered small pots in there too (really, is it possible to have too many plants?). I plant to take some detailed notes/photos of what is in each pot, so I may share those in the future.
You may also notice that I have a color theme going, and all of these pots are varying shades of blue, with a few white/black thrown in. I think it helps to keep some balance (i.e. all in the same color family), especially because I wanted to mix up the plants I chose for each pot.
To sum up this post, consider gathering pots together for added visual effect, and also consider varying the height to make each pot's flowers stand out on their own. Don't be afraid to make something work better for you, like spray painting plant stands. Just be sure that you really want it before you lose your ability to return it. :) When you are trying to decide what to plant where, keep in mind your light conditions (part shade for the most part on my deck), and your willingness to water pots. All of my pots are fairly deep for their size, and I use MiracleGro Moisture Control (I think it just has extra perlite in the mix?) in these to help retain moisture. I'll still end up watering them most nights once it gets to the hottest days of the summer.
I think that's enough plant life for one post! Hope you are enjoying your backyard during these long days! I know I am!
~Amy
This post is dedicated to the plant life that calls my new deck home, starting with this cute little corner:

To help you get your bearings, the corner is located here, by the orange arrow:

This spot is too small to hold much furniture (picture the traffic flow from the top deck to the backyard), so I decided on a grouping of potted plants instead. To raise the pots off the deck floor, I went on the hunt for plant stands. After some searching at Home Depot without much luck, I found three matching plant stands at Home Goods in 3 different sizes (I think they were something like $10, $15, and $20). The only problem was, they were in a oil-rubbed white color, which looked like this on my deck:


You might be thinking to yourself, "umm, Amy, nice job on the photography, I can't even see those." But that's the point. I think they were going for an aged finish, but on my deck, they just looked dirty and sort of invisible. A can of spray paint fixed the issue, and tied them in with the rest of the deck decor in a dark teal color (specifically, Rustoleum's Dark Turquoise):


On the left, I have a large pot welcoming you as you make your way up the stairs from the yard. The plant choices turned out to be a little wacky in this pot, but oh well:

Next are two hanging baskets that were a birthday gift from my parents, one of which became a home to a mama mourning dove. She just showed up one day with her eggs, and squawked at me until the babies flew the next.

Next is a pot of yummy herbs:

Then a pretty blue glazed pot with all sorts of things in it:

The fuchsia might be my favorite, but the variegated petunia is a close second.

There are a couple scattered small pots in there too (really, is it possible to have too many plants?). I plant to take some detailed notes/photos of what is in each pot, so I may share those in the future.
You may also notice that I have a color theme going, and all of these pots are varying shades of blue, with a few white/black thrown in. I think it helps to keep some balance (i.e. all in the same color family), especially because I wanted to mix up the plants I chose for each pot.
To sum up this post, consider gathering pots together for added visual effect, and also consider varying the height to make each pot's flowers stand out on their own. Don't be afraid to make something work better for you, like spray painting plant stands. Just be sure that you really want it before you lose your ability to return it. :) When you are trying to decide what to plant where, keep in mind your light conditions (part shade for the most part on my deck), and your willingness to water pots. All of my pots are fairly deep for their size, and I use MiracleGro Moisture Control (I think it just has extra perlite in the mix?) in these to help retain moisture. I'll still end up watering them most nights once it gets to the hottest days of the summer.
I think that's enough plant life for one post! Hope you are enjoying your backyard during these long days! I know I am!
~Amy
Sunday, June 12, 2016
A Solution to a Tiny Garage
Hi Friends!
Ok, this post doesn't have any inspiring DIY projects, or great before and after photos, but it does have some practical, reality-of-not-living-in-a-mansion thoughts about how to make our house work for us. Maybe a few of you out there can relate?
I may have mentioned before that our home has a small one car garage. As in, pretty much fits the lawn mower and Christmas decorations, small. I constantly find myself navigating the balance between my desire to not collect stuff that I don't need (i.e., lets not fill this house to the brim before we add kids to this situation!), and being able to organize and get to the stuff I need.
I would show you a picture of what our garage looked like, but honestly, i can't shame myself that much on the internet. Just know that it was full, and ugly. I started thinking about the possibility of adding a shed to our backyard, mainly to house the lawn mower and other lawn tools, but hesitated because, well, sheds aren't exactly cheap. One day I was walking through the neighborhood, and it dawned on me that all of our neighbors have similarly sized houses and we were the only ones without a shed. So, a shed seemed much more justified, and necessary, once i realized that everyone else was in the same boat.
Our next decision was whether to buy or DIY. I have explained my thought process with decisions like this before (like here), but basically it's a matter of whether we have the skill set to take on the project, and from there it's cost vs. time. I felt like we have the skill set at this point to build a shed, maybe with a little help in a few critical areas. However given my long list for the summer, and the fact that I wanted the shed to be in place sooner rather than later, we ultimately chose to buy the shed. There is a place down the street which builds them, so delivery was easy, and their sheds are of good quality. It did end up costing more, maybe 25% more than if we had built it ourselves?
Side note: working with an Amish outfit turned out to be a really entertaining way to go, and the amount of options for this shed were pretty impressive. Sad to say we passed on the rooster cupola...
Friday was delivery day, and I was home to watch the action...

And here it is on its new pad in the backyard:

I at least got a start on moving things out of the garage/organizing (exciting only for me, I know):
 \
\
Maybe once we get everything in, I'll do a post about what we were able to fit with the size shed we purchased... you know, if you can handle the excitement of another shed post!
If you don't have a shed builder within walking distance of your house (although I think the one near me delivered within 25 miles for free), I did see some kit options through the major home improvement stores that might be a good compromise between full DIY and having someone build for you. You lose some customization options, but it seems fairly straightforward.
Also, if you are planning for a shed, make sure you check with your township for if/where one can be placed in your yard, and if the work requires a permit (ours did).
Now that we have this shed, there's a chance i could park my car in the garage in the winter.... what a luxury! ;)
Have a great week out there!
~Amy
Wednesday, June 8, 2016
Deck - Part II
OK friends, this one is big. At least to me. We can finally call our deck, at least the structure, finished. *Sigh of relief*
In case you haven't been following along, here is what we started with:


In case you haven't been following along, here is what we started with:

Old, worn out, and in some cases improperly built. Back in 2014 we tackled the "top deck", which comes off of the dining room. You can read about that here. Here's what it looked like by the end of 2014:

And here's where we are today:


The construction was finished up around Thanksgiving last year, and I was finally able to stain it in the late spring. You can see that we went with the same herringbone pattern for the decking (centered at the door) as the top deck. There are steps to the back yard, and then steps to the patio we built underneath the top deck.

I started out thinking that I wanted a full roof on this side, but after weighing all of the options, we landed on a pergola. I hung shade cloth to help it feel a little more like a room (post coming soon!), which has become a good alternative.


I'll go through all of the projects for filling the space in later posts, but for now I just wanted to share our new space. It looks cozy at night too:

I got really excited before I stained the deck and actually drug everything out, just to see how it would look:

It was a lot of work, and there is still some more to be done, but the deck itself is finally open for business! :) We are so happy with how it turned out, and it really gives us options for entertaining that we just can't do inside the house. Our house isn't big enough for a crowd, but this deck opens up so many possibilities! Aside from entertaining potential, we eat many of our meals at our table on the top deck, and find ourselves just resting out here in the evenings.
If you live in the local area, and are thinking about revamping your outdoor space, consider Huber Landscaping and Excavating (http://www.huberle.com/) for your project! This is a great example of the work he does!
Stay tuned for more posts about the details!
Take it easy,
Amy
Sunday, May 22, 2016
Did Porch Paint fix our Porch?
Let's just be honest here - the front porch, er, stoop, to our house is ugly. I would love to have a welcoming front porch with rocking chairs and hanging flower baskets, but that's not really going to happen on this house. After we built our retaining wall last year, my eyes woke up to just how sad our porch situation had become:

Some of that ugliness was mildew, but mostly it was from old paint peeling off, and the concrete spalling (aka falling apart). Yes, Hubby, I used that word again. You married an engineer.
As usual, I have a plan in my head for what I would like to do as a permanent fix, but who knows if it will ever happen. After building that wall though, I just couldn't take the ugly stoop any more. About that time, the home improvement stores were running adds for the ultra thick porch/deck paint, saying that it could bring new life to worn out concrete and decking. Too good to be true? Maybe. Worth a shot? Sure. I mean, was it going to get worse than this?

I picked up one gallon of Behr's Deck Over paint in a light gray color, attempting to coordinate with the new concrete blocks, and set off to fix my ugly porch. I also grabbed a can of black spray paint and gave the railing a fresh coat of paint while I was at it.
The first step was to give the whole surface a good wash, and try to get all of the loose pieces of concrete off. This is pretty much impossible, but loose pieces are only going to fall of later and mess up the coating, so I did what I could. Then, I took some concrete patch/filler and filled in the worst areas.


Finally, I coated the porch in the Deck Over paint, following the instructions pretty carefully (rare moment around here). The paint requires two coats, and is more like the consistency of brownie batter than paint. It took most of the gallon to cover my porch and steps. It really is more of a coating than a paint, and so it smooths out a lot of the rough surface on the concrete. After I was finished, here's what we had:


Not bad, huh? I mean, it's still concrete, but at least it looks fresh and clean. I was much happier to walk up to this at the end of the day than the cracked, mildew covered nastiness that was there before.
So, here we are, about 8 months later. How did we like it and how did it hold up?
First, dirt does not come off of this thing easily. Rain does not wash it clean, and neither does a spray down with the hose. I had to get out a scrub brush and cleaner to get the dirt off of the porch! I thought that was a little weird.
Second, it could not withstand the snow shovel. I didn't really expect it to, but there wasn't really anything else we could do with two feet of snow! It was pretty quick to peel with any shoveling, which is something to consider depending on where you plan to use it.
Here's how it looks today:

It has chipped in many places, and dirt has settled in, especially since it has been raining constantly for the last 6 weeks.
So, to recap, before:
Immediately after painting:

And one year later:
I really wanted to photograph this when the sun was shining, but since that just isn't happening these days, we'll have to deal with the 'one year later' photo being extra dreary... sorry about that!
Anyway, if you are thinking about painting a concrete surface, I hope this helps you to decide if it's worth it. It definitely looks better than it did, but i'm not sure it's looks great. Maybe in an area with a little less abuse, it might work a little better?
Happy DIY-ing!
~Amy
Subscribe to:
Posts (Atom)