Wednesday, December 31, 2014

Recycled Yard Lights

Hey there!

Hope everyone had a nice Christmas!  I realized that we are in the middle of the after-Christmas sales, and thought this idea might be timely.  Have you noticed that some decorations are clearly for Christmas only, but some of them are basically normal items that are disguised as Christmas stuff?  Take these for example:


And let me apologize now for the bad pictures... I didn't think it was worth breaking out the real camera for this one, and well, I learned my lesson.  

Sunday, December 7, 2014

It's Christmas Time Already?

Hi there friends!

It's good to be back!  After dedicating the last 7 weeks or so entirely to my engineering job, I finally have a chance to breathe again.  Hopefully in the next couple weeks I will have some fun projects to share.  I actually tried to finish a few projects in the last couple months, but for one reason or another most of them did not turn out how I hoped.  Picture a nicely decorated clay pot.... with a dead plant inside.  oops.  Maybe I'll share those in a future post and we can laugh at them together.  

Today I am going to share a couple Christmas ideas, as well as my favorite recipe for a cold weather drink- chai tea.

I have two simple ornaments to show you that look nice, don't cost too much, and are easy to put together.  I made both of these a couple years ago, but have used them on our tree every year since.

Wednesday, October 29, 2014

A New Deck!

Finally!  I have been hoping that I could write this post for weeks, but it is time to show you our finished deck!

First the back story.  When we moved into this house 3 years ago, we knew we would need to replace the deck.  It was 25 years old, and was definitely showing its age.  This has been on the top of our list for a while, but things just kept jumping in the way.  This year, we saved up specifically for the deck, and finally made it happen.

Tuesday, October 28, 2014

I'm Still Here!

Hi Everyone!

Just in case you have traveled over in the past couple weeks, only to find nothing going on over here, I wanted to assure you that I haven't forgotten about the blog!  If you know my job well, or have talked to me in the last couple weeks, you know that I have a busy season in the fall where I spend most of my time at work, which we call a refueling outage.  It's a neat time at work because I get to leave my desk a lot more than I usually do, but my home life tends to suffer a bit.  This year, the outage is particularly long, so posts may be somewhat scattered for the next month or two.

I have a nice long post coming soon about a big project that is finally finished(!), and a few already completed projects that I can write about, but believe me, the wheels are turning dreaming up new projects! (I can hear my hubby now: noooooooo!!)

Thanks for understanding!
~Amy


Sunday, October 5, 2014

Easy To Check-Off #2: Fresh Paint

Hey y'all!

First, there are still about 3 days to enter my contest for some greeting cards made by my favorite artist (and sister)!  Check out this post to enter.  Hope you love her work as much as I do!

On to the real subject of this post- may favorite way to change up a room!  You may have read about my reason for repainting some of the rooms in my house, and I hinted that I was going to be bringing in a more dramatic change in the kitchen and dining room.  Today's the day I'll be showing that to you!

I mentioned on my previous post that I am working toward a more cohesive paint scheme in my house.  Not necessarily painting each room the same color, but trying to keep in a consistent palette of color.  After repainting the living room a more soft color, the dining room and kitchen really stood out in all of it's guacamole colored glory.  Here's what we had before:


Now, I really like this color, but I may be the only one.  This is the first room that I mentioned I would be painting and got the response of "oh, that sounds good" from my hubby.  I think he more has an issue of the walls being named after a Mexican condiment that he despises more than the color itself, but hey, he was happier than usual about my wanting to paint, so I'll take it. 

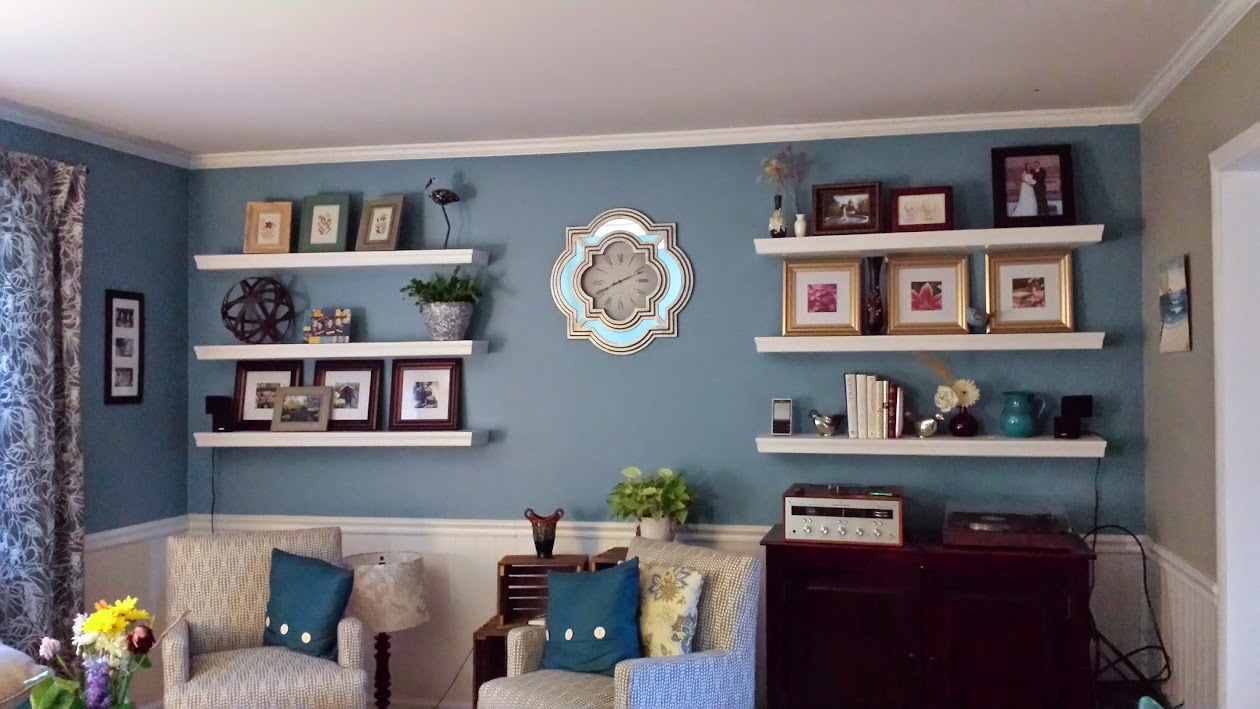
To recap, here are the colors that I just put in the adjacent living room:


Benjamin Moore Gray Owl and Colorado Gray

And here are the two colors that I narrowed the kitchen down to:


Benjamin Moore Summer Shower and Woodlawn Blue

Ultimately I chose to go with the Woodlawn Blue because it was closer to the 'mint' color pictured in my head.  I chose to go with BM's Royal line of paint this time, and it certainly was thicker than the Ben line that I used a few weeks ago.  I still needed 2 coats, so the paint didn't quite go as far as the Ben paint seemed to, but I used less than a gallon, so no big deal.  I'm hoping that it will hold up well.

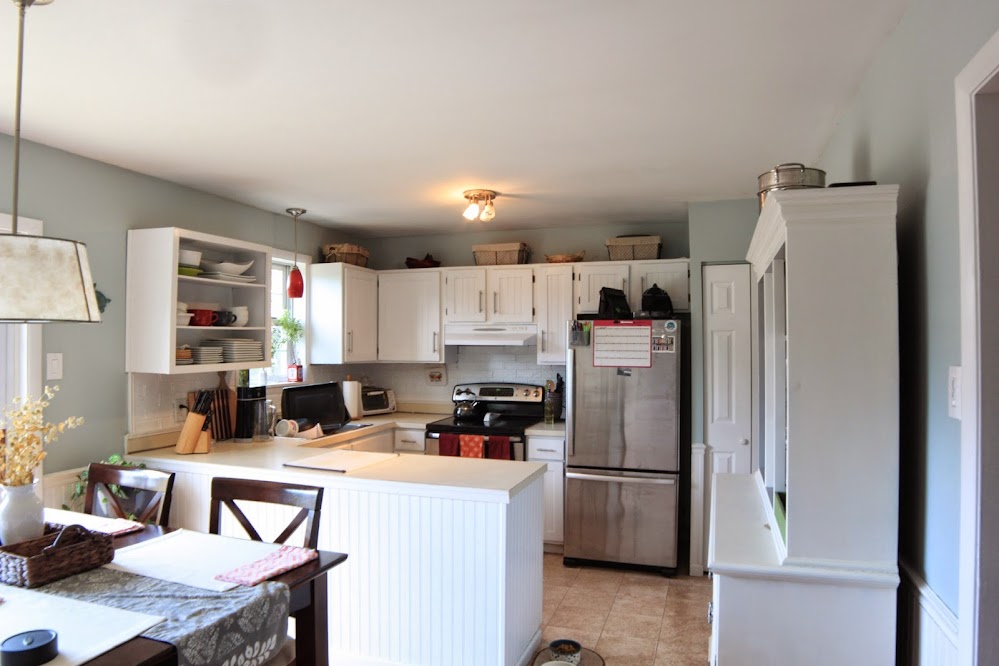
So, here's the "new" kitchen and dining room!


And some before and after:


It has definitely 'cooled down' the room by a lot, for better or for worse.   I like that our darker furniture doesn't compete with the wall color any more, and I like the contrast that's there now.


Eventually I would like to replace the kitchen counters, which are in kind of rough shape, and right now I'm leaning toward a dark butcher block, although it's so far down the road that I'm sure I'll change my mind about 15 times before then.

So, for about $50 and a few hours of my time, I was able to change the look of my room pretty dramatically.  Now this room had minimal furniture to move, so painting may not always fit in the 'easy to check-off' category, but it's definitely a good bang-for-your-buck investment.

Any painting projects going on out there for you all?  

Thanks for stopping by!
~Amy

Wednesday, October 1, 2014

Time for Fall- and My First Giveaway!

Hello again!

Now that summer has officially moved out, it's time to brace ourselves for awful winter enjoy warm drinks and pumpkin everything (I'm really trying to be positive!).  I have finally given up on my summer flowers on the front porch and have replaced them with fresh pumpkins.  Soon I'll be bringing my more delicate plants inside and hoping I can keep them alive over the winter.  Then again, as I type this it's 80 degrees outside, so who knows what to expect!


I have seen a lot of fall party ideas come across my computer screen lately, more than I remember from previous years.  Plenty of table decorations, pumpkin lanterns, and cider recipes.  Even with all of the internet's ideas, I think the most ingenious idea that I have heard so far came from my Aunt.  Rather than dive into pumpkin everything right away and be sick of it by Thanksgiving, her family created a "Feast of Pumpkin", where they took one meal and made it all about pumpkin.  They put pumpkin into everything they could think of!  Isn't that a great idea!?  I mean really, how many of us will be sick of pumpkin by Halloween at this rate?  What a great way to actually enjoy the season, and a great excuse to get together with friends and family.

If you are thinking of throwing a party this fall, consider sending invitations by mail to invite your guests.  I don't know about you, but I still like getting cards and invitations in the mail, and I think most people do too!  

Which brings me to another family member with great ideas- Michelle from Michelle Miller Illustration, who happens to also be my sister.  Michelle is an artist, local to South Eastern PA, who has been making art for as long as she has been able to hold a pencil.  One of her recent projects is to develop a line of greeting cards.  She paints the designs by hand in her signature style, which is really awesome by the way, and then prints the cards on heavy cardstock.  Just look at this one!


You can view her entire line here.  As I mentioned, she is currently working to build this greeting card line, so check back often for more designs.  She also has some great original artwork, so make sure you check that out as well.  Speaking of original, if you really want to have a special card to send out this holiday season, talk to Michelle about a custom card- maybe with your family or favorite pet?  Hard to beat that, huh?!  She has a great imagination, and I love getting to see whatever she is working on next.

So, to get your fall party started, Michelle and I are teaming up to bring two deals to you today!  First, Michelle is generously offering everyone reading the blog free shipping from her Etsy site through DECEMBER 15th (code: Lancasteraveliving).  Also, one lucky reader will be given a free set of 5 cards in any one style from her shop!  In order to enter, I'm asking the following:

1. Please enter the contest by visiting Michelle's site and picking your favorite design.  Then, leave a comment on this post with your selection.  I will randomly pick the winner on October 8th.

2. If you happen to be the lucky winner, please use the cards!  This is a great way to promote an up and coming artist, and it works best if those cards go in the mail! 

I hope you all have enjoyed the little taste of Michelle's work, and maybe have the motivation you needed to pull that party together!


Good Luck!
~Amy


Update: Thanks to those that entered my giveaway and offered kind word's for Michelle's artwork.  I picked the lucky giveaway winner in the most random way I could think of: I wrote your names on a piece of paper, put them in the floor, and chose the one Lucy Dog tried to eat first!  And the winner is...


Cady Bond!


Remember, everyone is offered free shipping on Michelle's Etsy site using the code Lancasteraveliving through December 15th.

Friday, September 26, 2014

Easy to Check-Off #1: Light Switches

My name is Amy, I am a type A personality, and I am an (almost) obsessive list maker.  Really though, it's not making the list that I like, instead it's checking things off the list.  I love finishing a task and getting to cross it out.  It's so bad that when I make a list, I have been known to put things on the list that I have already finished, just so that I can cross them off.  That's how you know you are in type A Crazy Town by the way.  Anyone with me?

Well, when it comes to my home to-do list, the items on my list are of all shapes and sizes.  Some will take months and a lot of cash, and others are quick and easy.  The first (long term) are those projects that you are really excited about for a long time after they are done, and the second kind are ones that are just nice to knock out.  Because you can.  Now.  (Hear the type A yet?)  So, we'll see if this turns into a recurring thing on the blog, but for now, I'm thinking through a few "Easy to Check-Off" projects that take very little time, and hopefully not too much cash. 

First up on the list- upgrading light switches.  Ok, stick with me here.  Just remember, "easy to check off", not "super life changing". :)

This was one on my list because our light switches were a bit of an eyesore.  They were that yellow plastic that someone had unsuccessfully painted, and half of the switch plates did not match the rest.  Did my husband notice?  No (not a type A).  Did I?  Oh yes.  

Ready for this ugly show?  Brace yourself.  (Que unnecessary dramatic music)


And the grossest of them all- the dining room dimmer switch:


For about $80, we were able to upgrade all the switches in our house with the nice flat rocker switches and new plates.  A big chunk of that cost was the dimmer switch, but I just couldn't leave it in it's ugliness. So, now they look something like this:


This is one of those updates that people probably won't notice, but it helps to create a nice clean look. 

I won't go into detail about how to wire them, as I am no home wiring expert, but we basically just cut the power, and hooked up the old switches the way the old ones were.  

I will say to make sure you take good notes before you head to the store about which are on/off switches, which are 3-way switches (which they sell in odd numbers... haven't figured that one out yet) or dimmers, and which have multiple switches on one plate, if you decide to change the switch/plate combo entirely like we did.   

We finished all of the switches upstairs in about an hour and a half, so not too much time invested there.  Most importantly, it is off the list! ;)

Any easy upgrades that you have crossed of the list?  Any of those 'why didn't I do it sooner' moments?

Have fun!
~Amy

Thursday, September 25, 2014

New Page Added to the Blog

Hi Friends!

This is just a quick post to call out the new page I added to the blog.  You should see a tab at the top called "Our House".  Going to this page will give you a list of the projects we have done in our house so far, listed room by room.  This page will be updated regularly, so you can always look here if you are having trouble finding a particular post, this will hopefully make it easy for you!

Comments and suggestions are welcome!
Enjoy!
~Amy

Tuesday, September 16, 2014

Painting Woes


I think I have mentioned before on the blog that I received some really good advice from a very thrifty coworker regarding paint: buy the best paint you can afford.  There are ways to save money when decorating your home, but paint is not the place to be cheap.  Let me explain why I subscribe to this theory.

We moved into our house about 3 years ago, and the walls were butter yellow.  Fine for the look the previous homeowners were going for, but not my style.  So, before we even moved in a friend and I painted the main area of the house.  The only problem was, after going through the process of buying the house, I was not in the mood to spend more money!  I bought the cheapest paint that I could, reasoning that I would probably change my mind in a few years anyway (my childhood room was painted something like 5 times in my 20 years there), so did it really matter?  

It mattered the first time I tried to clean a spot off the wall.... and wiped off the paint.  I painted with the right finish (eggshell), which meant that it should have been ok to clean.  Then it started chipping and peeling away every time something would rest against it, even something light like a picture frame.  The last straw was this week when i came home to find a wreath, which was hung with a 3M hook, laying on the floor.  The hook was fine... the paint had peeled away from the wall!  This particular wreath was a gift specially made for me, in the best colors on earth- maroon and orange- because I love my Virginia Tech Hokies.  Now I am entering football season without proper team swag, which is truly unacceptable.  (Go Hokies!)

Here's the thing- three years later, I still like my paint color.  Go figure, the one time I'm not sick of it, and it falls off the walls on it's own!  Whether I like it or not, fresh paint is in my future.  

Since I have to paint anyway, I am taking the opportunity to tweak the colors just a little bit.   Why change if I like the colors?  It's not a big change, but it will help tie in the other colors in the house.  I have been reading lately about using a consistent color palate throughout the whole house, so I'm trying to give that a go.

Ok, let's cut the chatting and get down to some before and after photos, shall we?

In my house, the living room, entryway and main hallway are all connected, so they all get the same paint scheme.  I used two colors just to break it up.  Here's how it looked:


Before:
After:

Before:
After:


On the cards, here are the colors:
Before (I don't think the actual paint was Valspar):

Lyndhurst Castle Sand  Summerhouse Blue
After:
Benjamin Moore Gray Owl and Colorado Gray


As you can see, it's not a huge change, but I think it works a lot better. After a long discussion with the sales rep, I went with Benjamin Moore's 'Ben' line of paint, and even though it is one of their less expensive options (remember, most expensive paint you can afford at the time, not most expensive in existence!), it looks really nice and I have already successfully cleaned a spot off the wall!  It did feel a little thinner than I am used to, and I was a little surprised that I needed 2 coats, so I am not sure sure how it would do with a really bold color.  The final product does look really nice!  Side note: I have also had good success in other rooms with Behr's Premium Plus Ultra paint.

I know I skipped right to the "after" photos, but here are a few tips to deal with less-than-high-quality paint:

- Your first step should be to wipe down the walls to make sure you have removed any dirt or oil- and this time, who cares if you rub the old paint off! :)

- Before you paint your new color on, lightly sand the walls in any place where you see bumps, drips, or chips in the old paint.  If the chips are deep, fill them now.  I used lightweight spackling to do this, although you may need something different if you have large areas to repair.

- Prime the walls with a good primer, focusing on any chipped areas to make sure you have 'sealed' them off. 

-I'm sure most of you know this, but if you have areas with high ceilings, you may not need a special pole to attach to your roller handle- most brooms and mops have a removable pole that will fit your roller. 

swiffer mop to the rescue!

- For what it's worth, I like using this tool for my edging, which saves me from taping.  There's definitely a learning curve to this thing, because if you dunk it in the paint the wrong way it will make more of a mess, but once you get the idea down, it is a definite time saver.

Total cost for this project: ~$80 for paint and supplies
Total time for this project: 8 hours plus drying time  

The kitchen is the next room on the list for paint (it was also painted with the bad paint), and it will be a more dramatic change, so stay tuned!

~Amy


Saturday, August 30, 2014

Entryway Key Hook

If you spend much time on Pinterest or home decorating blogs, you probably know the idea of an Ikea Hack... where someone takes a relatively plain, inexpensive item from Ikea and makes a few changes to make it look great.  Well, this one is similar- a Target hack.


Friday, August 29, 2014

A New Gallery Wall- The Easy Way

Happy Labor Day Weekend!  I hope you have some fun things in store for the next couple days!  I'm happy for the extra time at home, but to be honest, I'm not thrilled that we are getting to the end of summer.  I like fall, but it means that the dreaded season of winter is coming... anyway, on to happier, non-snow related thoughts.

I wanted to share a project with you that I just finished- a new gallery wall for our entryway.


Saturday, August 16, 2014

A Quick Fix to a Boring Problem

Today's post is an up-cycle that I am very excited about, probably because I just did it this morning!  Which is why I'm spilling the beans up front:

New life to a seriously old crate

Sunday, August 10, 2014

To DIY or Leave it to the Pros??

Happy Sunday!

I have no exciting project reveals today, but I am feeling the need to write the almost obligatory post for a DIY blog: knowing your limitations.  We spent the morning yesterday finishing the demolition of our deck, and found a few frustrations along the way which brought out something important to me.

But first, let's talk about something great: progress!  We are completely without a deck on half of our house, and I couldn't be more thrilled!  Next comes pouring the concrete footers.


It's a bit messy, but look, no deck!

And on to the rest of the post...

Tuesday, August 5, 2014

The Picnic Table and a Deadline

Hey There!

So, it's been a few weeks since the last post... we needed a break from the routine and electronic devices, and so we spent 10 days here:


Rocky Mountain National Park

Just before we left, I finished up a project for a friend, let's call her M.  M had asked me a few weeks ago if I would refinish her picnic table that was in need of some love, and I was happy to do it.  M says she likes the weathered look, and brown is perfectly fine with her.  Since she was on vacation just before we were leaving, I decided it would be great if I had it waiting for her when she got back- note, this was totally self-imposed.  I had two weeks to get it done- no big deal, right?  

Monday, July 14, 2014

It Has to Start Somewhere...

I love and also hate DIY shows for one specific reason- in an hour or less, something- maybe a kitchen, a whole house, or a backyard, is totally transformed.  Start with an ugly 1970's bathroom, half an hour later you have a bright, shiny, totally different room.  Ok, so the actual work doesn't really take 30 minutes, most of those shows take a whole weekend to film, right? 

Unfortunately, reality doesn't move quite that fast.  Bathroom makeovers do not usually take a weekend; believe me I've tried.  For those of us in the real world, with real jobs, and real chores, things take time.  

So, while I haven't finished anything that I can show you, we have gotten started on a few things this week that will eventually be great posts.  I am excited to get started on these project, and can't wait to be able to show some "after" pictures!

Friday, July 4, 2014

Potting Table- A brand new project (finally)!

It's finally time for a brand new project!  All of the posts so far were about projects that were already completed before this blog was started.  Now, we get to talk about a new one, start to finish!  Brace yourselves, because I actually remember what I did on this one...

I think this is an awesome project, although it is a little late in the season for it.  As you may have figured out by now, I love plants.  My spring days, or at least weekends, are usually spent gardening.  Up until now, I was using a ratty old metal/MDF desk as a potting table... ew.  I don't think I took a picture of it, but even if I did I would be too embarrassed to post it on the interwebs.  It really wasn't totally functional for many reasons, beside being hard on the eyes.  Ready to see the replacement??


Now THAT's ready for some gardening!

Wednesday, June 25, 2014

Make your own Floating Shelves!

Hello again!

I was hoping to have a blog post up about a new project by now, but life just gets in the way sometimes...  I promise, my project in the works is pretty cool, and has been well documented so far. ;)

Luckily, I have a few good finished projects left in the arsenal.  This is a fun one- floating shelves that you can build yourself.  


Friday, June 20, 2014

Driveway Planters

Hey y'all!  We'll be talking about more plants today!  One of my favorite days of the year is what I call my "planting day".  I really am not a fan of the winter, and so I spend the colder months anxiously waiting for spring.  I probably have about 15 photos of the first crocus to pop up in the flower bed every year, just because I'm so happy to see it.  The next milestone that I anxiously wait for is the day that I can finally start planting outside.  This is planting day.  I like to take a day (or three) off of work, hop in our old truck and drive from greenhouse to greenhouse picking up my plants for the spring.  

Tuesday, June 17, 2014

Backyard Planters

Today I'll show you some planters that we built for the deck.  Our deck is not very exciting (yet), but my biggest problem at this point is that it has no railing, and a steep step down to the grass below.  Until we are able to put something better in, I thought we could use planters to add some beauty and keep people from walking off the edge...


Sunday, June 8, 2014

Painted Buffet/Hutch


Sometimes I get ideas.  Sometimes, when I get ideas, I'm like a freight train barreling down the tracks that can't be stopped.  If I decide that something needs to happen, I forget to eat, and sometimes have a hard time sleeping until I'm finished.  Yeah, I know, crazy.  In a way, this was one of those projects.

Saturday, June 7, 2014

Picnic Style Coffee Table

We had been using some old furniture from my parents for a while, and it was time for something new.  When I went on the hunt for a new coffee table, I could not believe the prices of some of the more stylish ones!  I was hoping to replace a lot of the furniture in our living room, and so I was holding myself to a tight budget.


Friday, June 6, 2014

Garden Bench

Hey yall!

So this is the project that kicked off the blog.  I'm so excited to share it with you!  This is one of my favorite projects to date.  It was a little time consuming, but could be finished in a weekend.


I want to lay out what we did and what worked well, so that if you try to tackle something similar you might have an idea of how to do it.  Since I wasn't planning on making a tutorial at the time, there may be a lack of photos for some steps, but I'll try to describe it well enough so that you can figure it out.  


... and so she created a blog.

Earlier this week, I posted a project I had finished using some chairs from a local thrift store to that thrift store's Facebook page.  A few strangers kindly started asking where they could see my other projects, how I finished this one, and where my blog was.  I was flattered, laughed, showed my husband, and went back to tearing out a bookshelf in my basement.  After about 200 likes and 30 shares (pretty much viral in my little world), some little part of my brain started thinking and planning.  Isn't it funny what the suggestion of another person can do, especially someone you don't know?